

The Art of Little Quilts: Create Mini Masterpieces
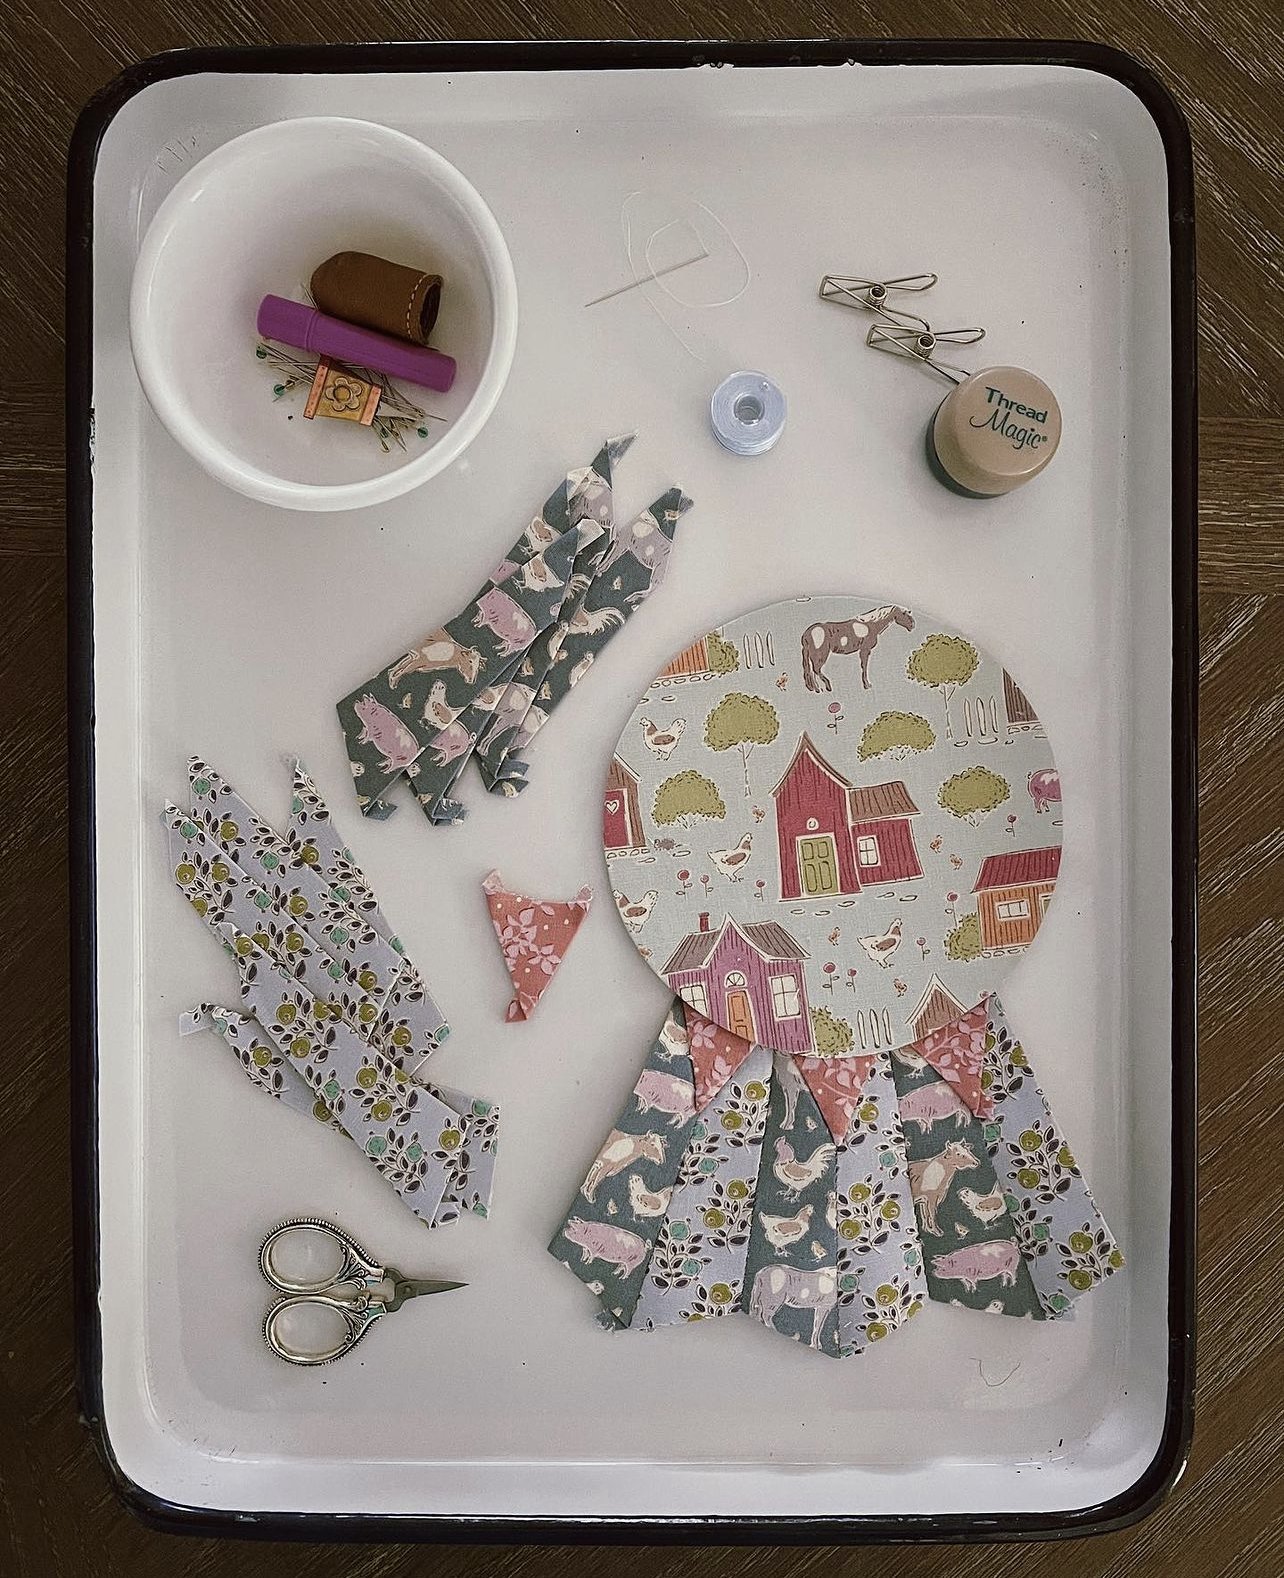
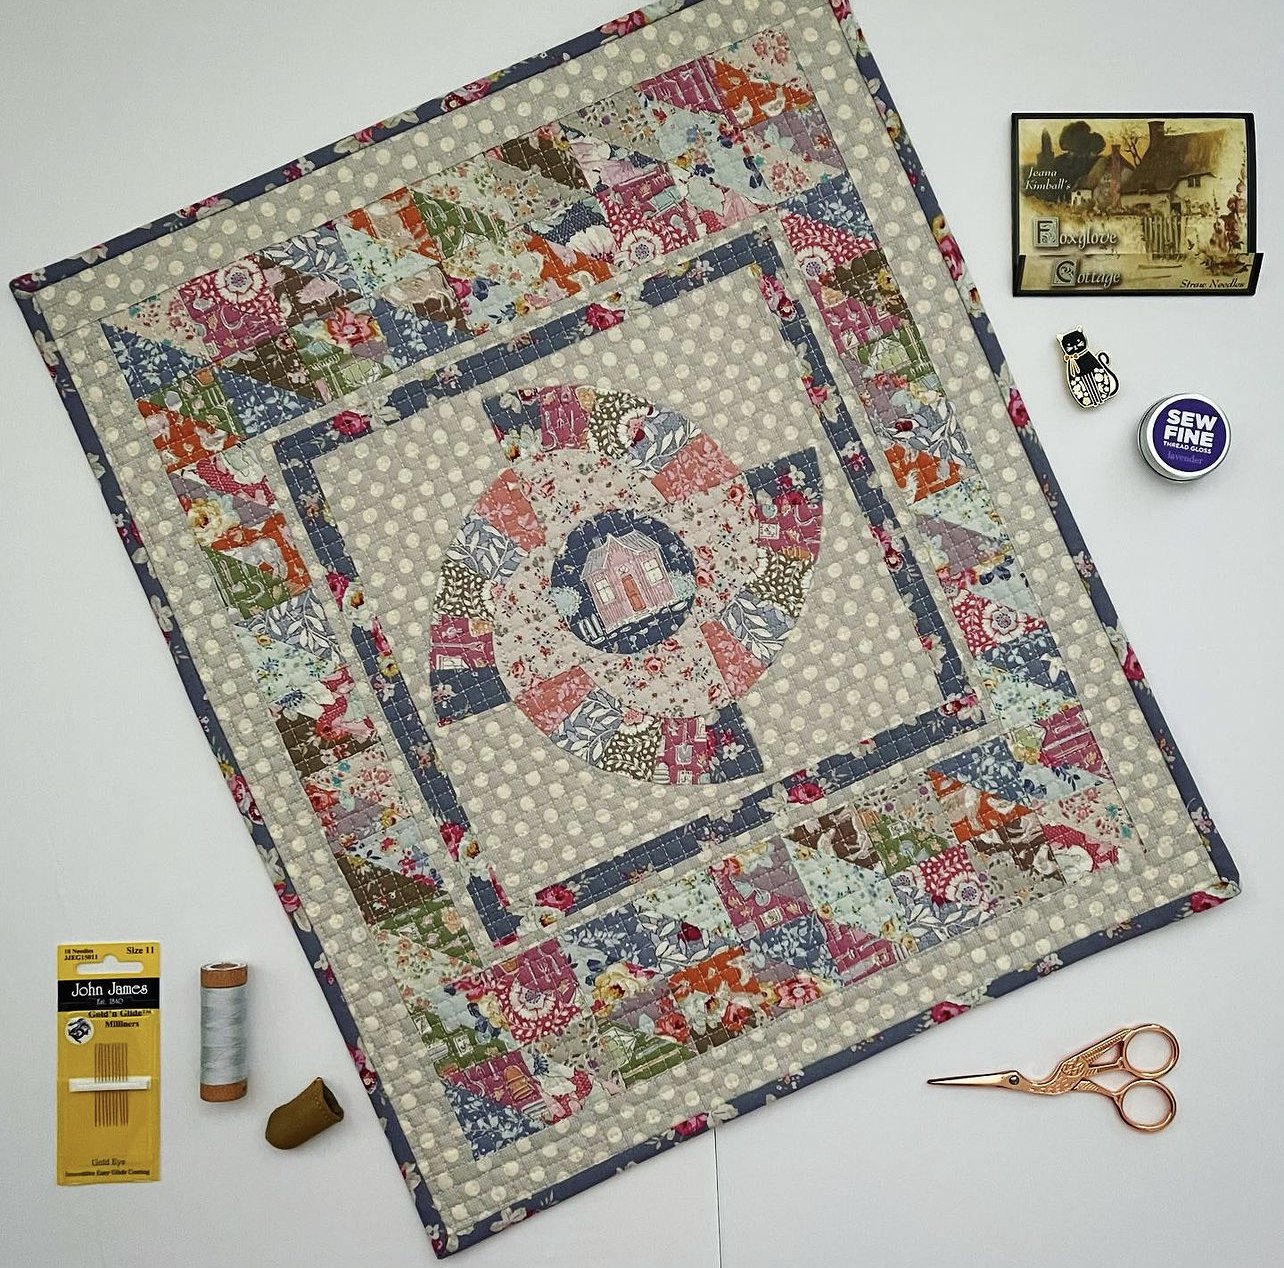
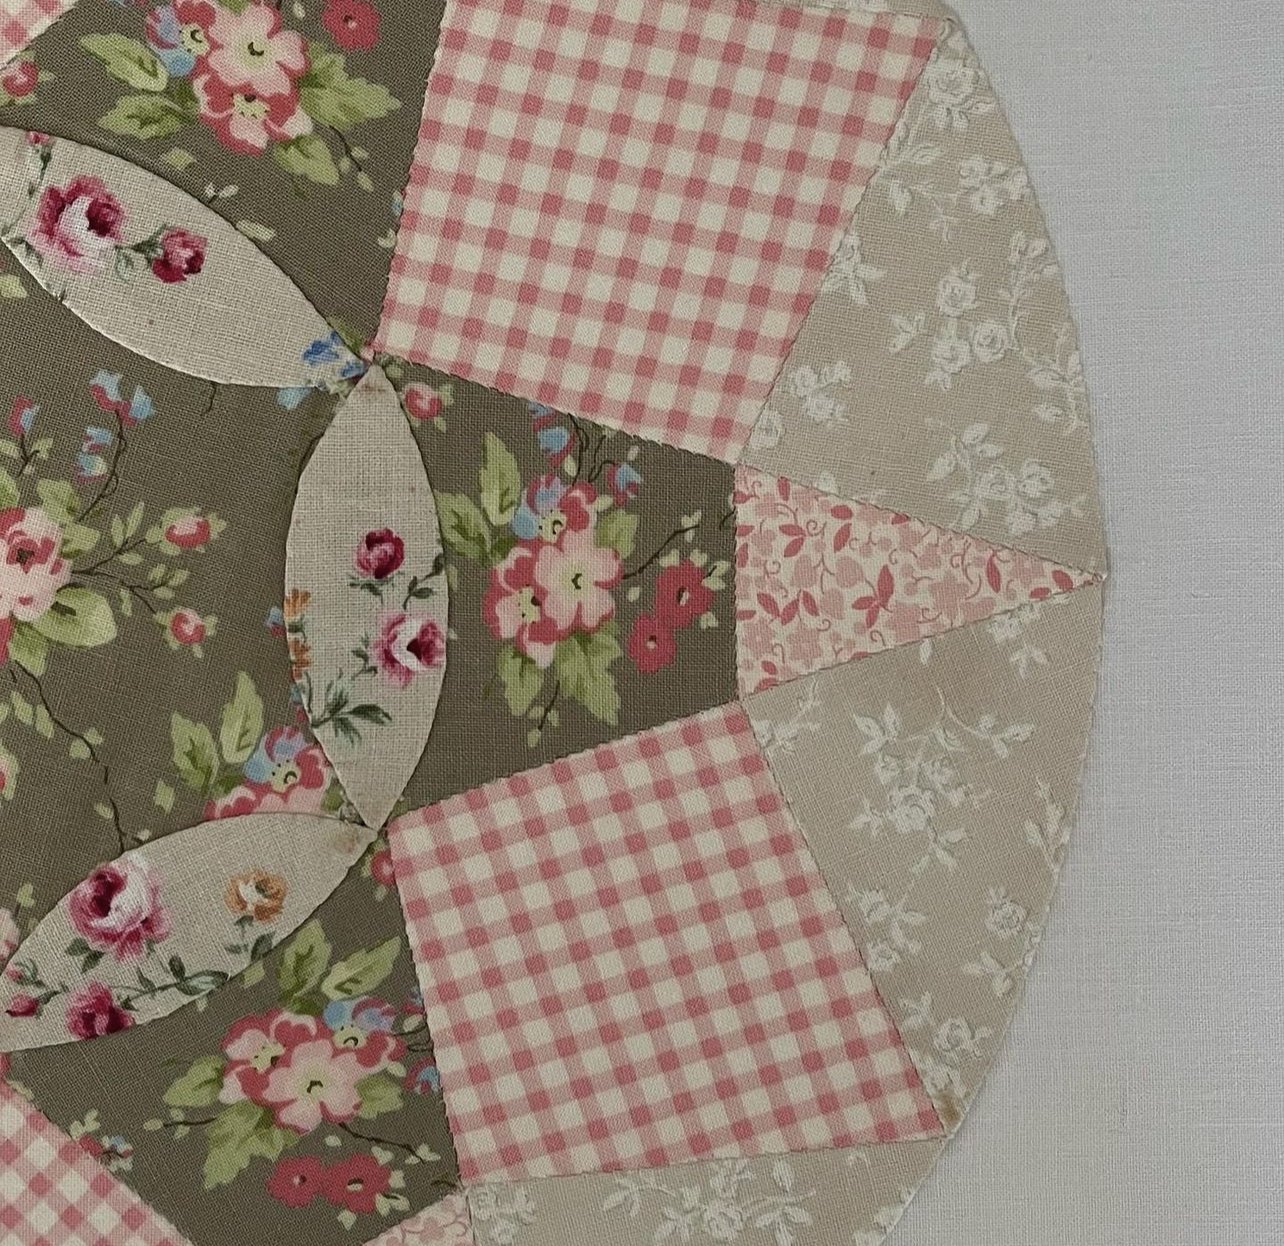
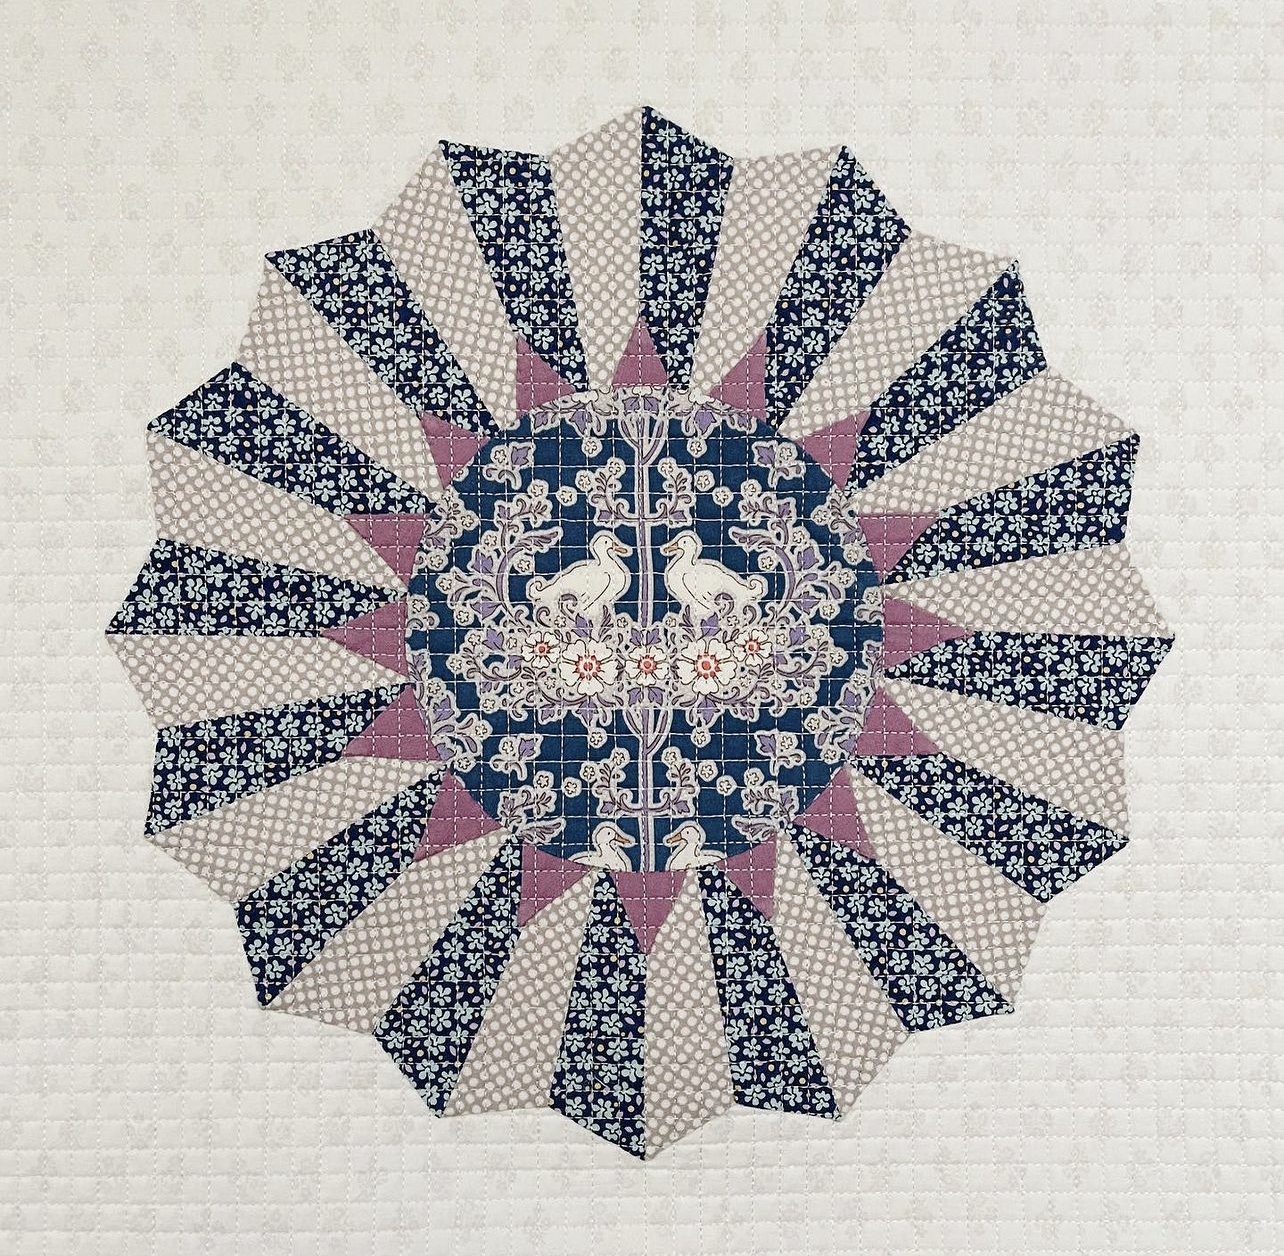
Above, L-R: Progress on Blanket Flower EPP; Tilda Doll Quilt made for the 2023 Tilda Doll Quilt Swap, featuring Tilda Fabrics, Bessie Pearl EPP center; upcoming EPP pattern featuring florals and ginghams from my stash; Blanket Flower EPP with Tilda Fabrics.
Are you a lover of quilting but struggle to find the time to complete larger projects? Look no further than the enchanting world of little quilts. These miniature masterpieces allow you to express your creativity and showcase intricate designs on a smaller scale.
In this article, we will dive into the art of little quilts and explore how you can create stunning mini quilts that pack a punch. From selecting the right fabrics to choosing the perfect patterns and techniques, we will guide you through the process step by step.
Creating little quilts not only provides a sense of accomplishment but also offers a unique way to use up fabric scraps and experiment with different color combinations. Whether you are a quilting enthusiast or a beginner just starting out, this article will inspire you to try your hand at making these charming works of art.
Join us on this journey and unlock the secrets of the art of little quilts. Get ready to create miniature masterpieces that will leave a lasting impression.
History and significance of little quilts
Little quilts have a rich history dating back centuries. In the past, quilters used leftover fabric scraps to create small quilts that served both functional and decorative purposes. These quilts were often made for babies, as they provided warmth and comfort. They were also used as decorative elements in the home, adding a touch of charm to any space.
While little quilts may have originated out of necessity, they quickly became an art form in their own right. Quilters began to focus on creating intricate designs and experimenting with different techniques, turning these small quilts into miniature masterpieces. Today, little quilts are highly sought after by collectors and quilting enthusiasts alike.
Tools and materials needed for creating little quilts
Before you begin your little quilt journey, it's important to gather the necessary tools and materials. While the list may be shorter compared to larger quilts, there are still a few essentials you'll need.
First and foremost, you'll need a good-quality sewing machine. Look for one that offers precision stitching and has a small footprint, as you'll be working with smaller pieces of fabric. Additionally, invest in a rotary cutter and cutting mat to ensure accurate cutting.
When it comes to fabric, the possibilities are endless. Choose high-quality cotton fabric in a variety of colors and patterns. You can also incorporate scraps from previous projects to add a personal touch to your little quilt.
Other essential tools include a ruler, quilting pins, needles, and thread. These will come in handy during the piecing and sewing process. Don't forget to have a pair of small, sharp scissors for precise trimming and snipping.
Choosing a design and pattern for your little quilt
One of the most exciting aspects of creating little quilts is choosing a design and pattern. While you may be working on a smaller scale, this doesn't mean you have to compromise on creativity. In fact, little quilts offer the opportunity to experiment with unique designs and showcase intricate details.
When selecting a design for your little quilt, consider the overall theme or aesthetic you want to achieve. Do you prefer traditional patterns or are you drawn to modern and abstract designs? Take inspiration from nature, geometric shapes, or even your favorite artworks.
Once you have an idea in mind, look for patterns that are specifically designed for little quilts. These patterns will have instructions and templates that are tailored to smaller sizes. You can find patterns in quilting books, magazines, or online.
When choosing fabrics for your little quilt, think about color coordination and contrast. Consider using a variety of prints, solids, and textures to add visual interest. Don't be afraid to mix and match different fabrics to create a unique and personalized little quilt.
Tips and techniques for piecing and sewing miniature quilts
Piecing and sewing miniature quilts requires precision and attention to detail. Here are some tips and techniques to help you achieve the best results:
1. Accuracy is key: Take your time when cutting and sewing. Use a ruler to measure and mark your fabric accurately. Pay attention to seam allowances and use pins to hold your pieces together before sewing.
2. Press as you go: Press your fabric pieces with an iron after each seam is sewn. This will help set the stitches and create crisp, flat seams. Use a pressing board or a towel on your ironing surface to ensure even heat distribution.
3. Chain piecing: To save time and thread, consider chain piecing. This technique involves sewing multiple pieces together in a continuous chain without cutting the thread between each piece. Simply feed the next set of pieces under your needle and continue sewing.
4. Use a smaller stitch length: When sewing small pieces together, opt for a shorter stitch length. This will help prevent the seams from unraveling and provide a neater finish.
5. Trim and square up: After sewing your pieces together, trim any excess fabric and square up your blocks. This will ensure that all your pieces are the correct size and will make it easier to join them together.
By following these tips and techniques, you'll be well on your way to creating beautifully pieced and sewn miniature quilts.
Applique and embroidery techniques for little quilts
Applique and embroidery are wonderful techniques to add texture, dimension, and personalization to your little quilt. They allow you to incorporate additional details and create unique focal points. Here are a few techniques to consider:
1. Raw-edge applique: This technique involves cutting out fabric shapes and attaching them to your quilt top using a small zigzag or satin stitch. The raw edges of the fabric are left exposed, adding a whimsical and textural element to your little quilt.
2. Needle-turn applique: This traditional technique involves hand-sewing fabric shapes onto your quilt top, turning the edges under as you go. It requires patience and precision but results in a clean and polished look.
3. Embroidery: Embroidery can be used to add intricate details and embellishments to your little quilt. Consider using embroidery stitches to create flowers, leaves, or other motifs. You can also add personalized messages or initials to make your little quilt even more special.
When incorporating these techniques, think about the overall design and how the applique or embroidery will complement the fabric choices and pieced blocks.
Quilting and finishing touches for your miniature masterpiece
Quilting is the final step in creating your little quilt. It not only adds texture and dimension but also secures all the layers together. Here are some quilting techniques to consider:
1. Straight-line quilting: This classic quilting technique involves stitching straight lines across your little quilt. You can quilt parallel lines, diagonal lines, or even create geometric patterns. Use a walking foot on your sewing machine for smooth and even stitching.
2. Free-motion quilting: If you want to add more intricate and decorative quilting to your little quilt, try free-motion quilting. This technique involves moving the fabric freely under the sewing machine needle to create unique designs. Practice on scrap fabric before quilting your actual little quilt.
3. Echo quilting: Echo quilting involves stitching lines around a specific shape or motif, creating a visual echo effect. It adds depth and dimension to your little quilt and can be combined with other quilting techniques.
Once you have finished quilting your little quilt, it's time for the finishing touches. Trim any excess batting and backing fabric, and create a binding to neatly finish off the edges. Hand-stitch the binding in place for a clean and professional look.
Displaying and caring for little quilts
Now that you have created a stunning little quilt, it's important to know how to properly display and care for it. Here are a few tips:
1. Display options: Hang your little quilt on a wall using a quilt hanger or frame. You can also drape it over a quilt rack or use it as a table topper. Experiment with different display options to showcase your little quilt in the best possible way.
2. Avoid direct sunlight: Direct sunlight can fade the fabric and cause damage over time. Make sure to display your little quilt in a location that is away from direct sunlight.
3. Regular cleaning: To keep your little quilt looking its best, gently vacuum it or use a lint roller to remove dust and debris. Wash when necessary.
Inspiration and ideas for creating your own little quilts
If you are in need of inspiration for your next little quilt project, look no further than the world around you. Nature, architecture, and even everyday objects can be great sources of inspiration. Take a walk in the park, visit a museum, or browse through quilting magazines and online platforms for ideas.
You can also join quilting groups or attend workshops and classes to learn new techniques and exchange ideas with fellow quilters. The quilting community is a vibrant and supportive one, and you'll find endless inspiration and encouragement.
The joy of creating miniature quilts
The art of little quilts offers a delightful way to express your creativity and showcase intricate designs on a smaller scale. From selecting the right fabrics to choosing patterns, techniques, and finishing touches, creating miniature masterpieces is a rewarding and fulfilling journey.
Whether you are an experienced quilter or a beginner, little quilts provide a unique opportunity to experiment, use up fabric scraps, and create charming works of art. So, why not dive into the enchanting world of little quilts and unlock your creativity?
Embrace the joy of creating miniature quilts and let your imagination soar. Get ready to embark on a journey filled with color, texture, and endless possibilities. Start small, dream big, and create little quilts that will leave a lasting impression. Happy quilting!